Select the color you want to use (for this we'll use this color), and change the color using filter→tone adjustment→gradient map. Set layer opacity to about 75%, and lightly cover what you've selected as an overlay, creating a light area.
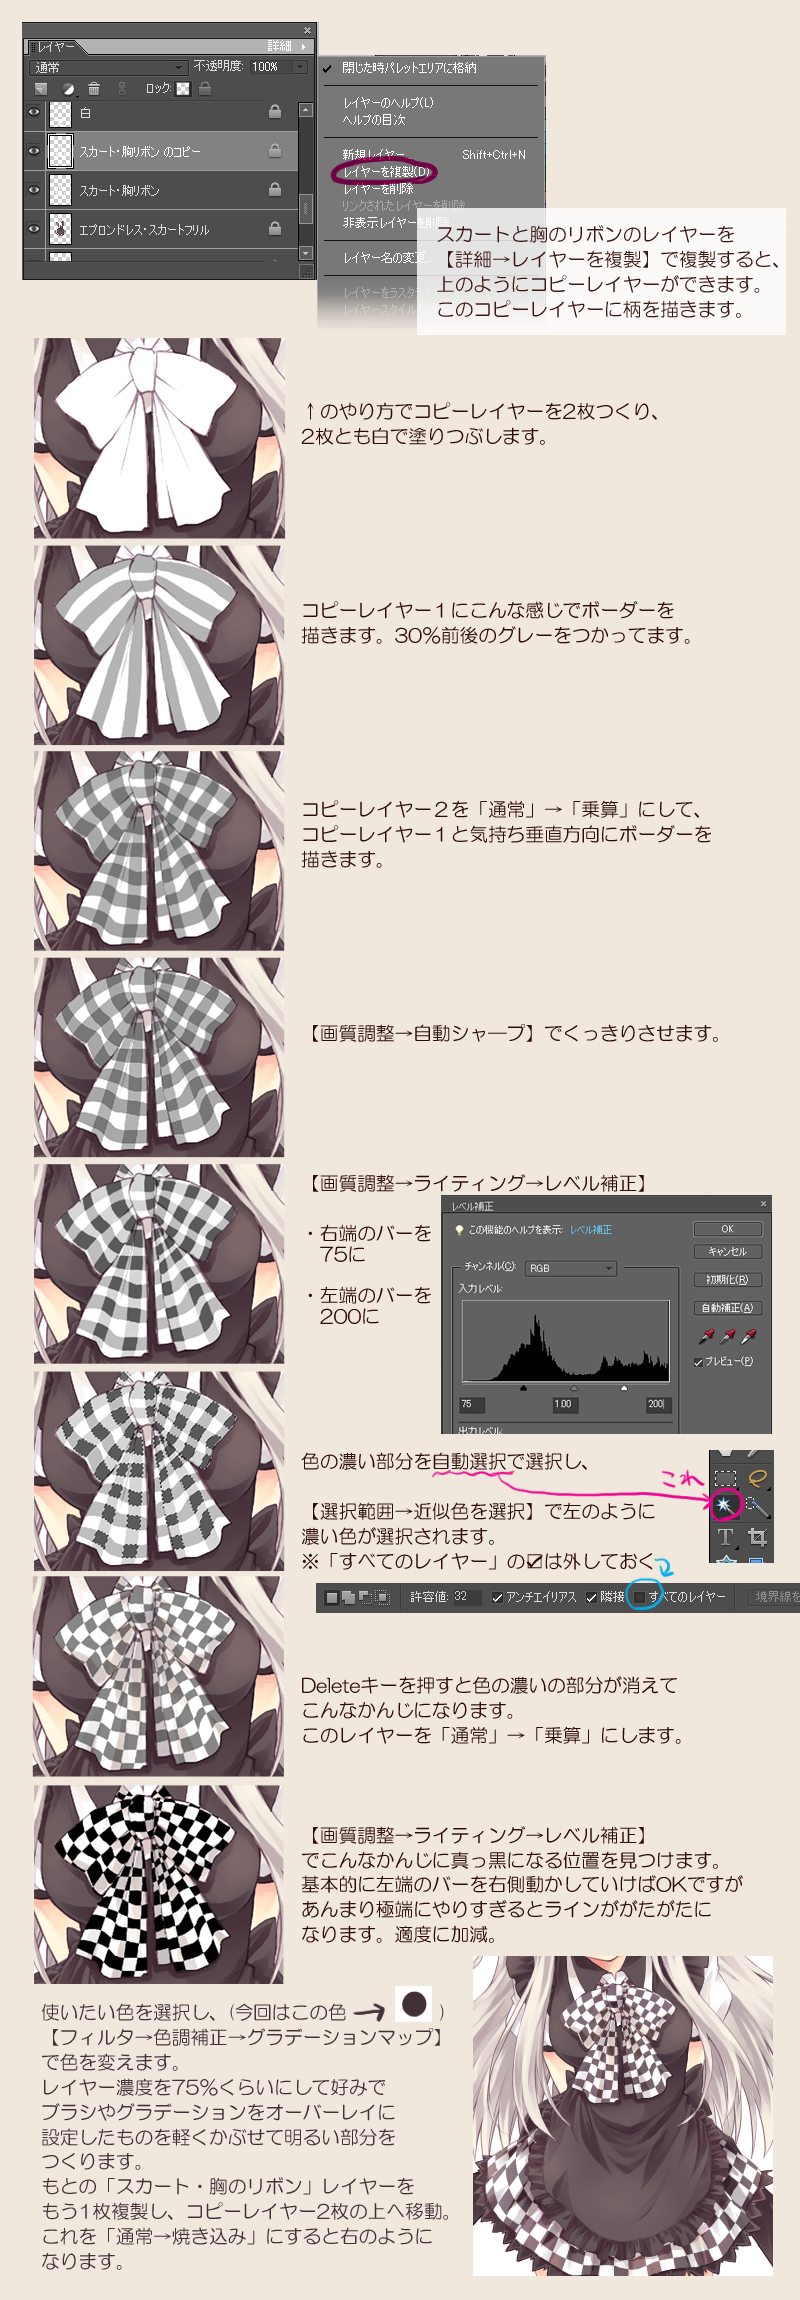
Create another duplicate of the original "skirt/chest ribbon" layer, and move it on top of the two copy layers. When you change the layer setting from "normal" to "burn", it will look like the image on the right.skirt, chest ribbonskirt, chest ribbon (copy)whitepinafore, skirt frillsDuplicate the skirt/chest ribbon layer using details→copy layer, and you will have a copied layer as seen above. We'll be drawing the pattern on this copied layer.duplicate layerdetailslayersCreate two copy layers, and paint both of them white.In copy layer 1, draw lines as shown.In copy layer 2, change "normal" to "multiply", and, in a fashion similar to copy layer 1, draw vertical lines.normalSet the field on the right to 75.Set the field on the left to 200.Pick out the dark parts with auto-select...thisPress the delete key, and as you can see the dark parts will disappear. Change this layer from "normal" to "multiply.quality adjustment→lighting→level adjustmentSelect the areas you've just made black, using quality adjustment→lighting→level adjustment. Generally you can move the bar on the left side to the right, but if you overdo it, your lines get too rattled. Do it to a moderate amount.Make it stand out with quality adjustment→mechanical pencil...and set "selection range" to "similar color", and the dark color will be selected.Un-check "all layers'.